First, install the Reporting Server for CRM. After creating the reporting instance, install the CRM Reporting Extensions. Be aware, that after the installation, you have to restart the reporting server.
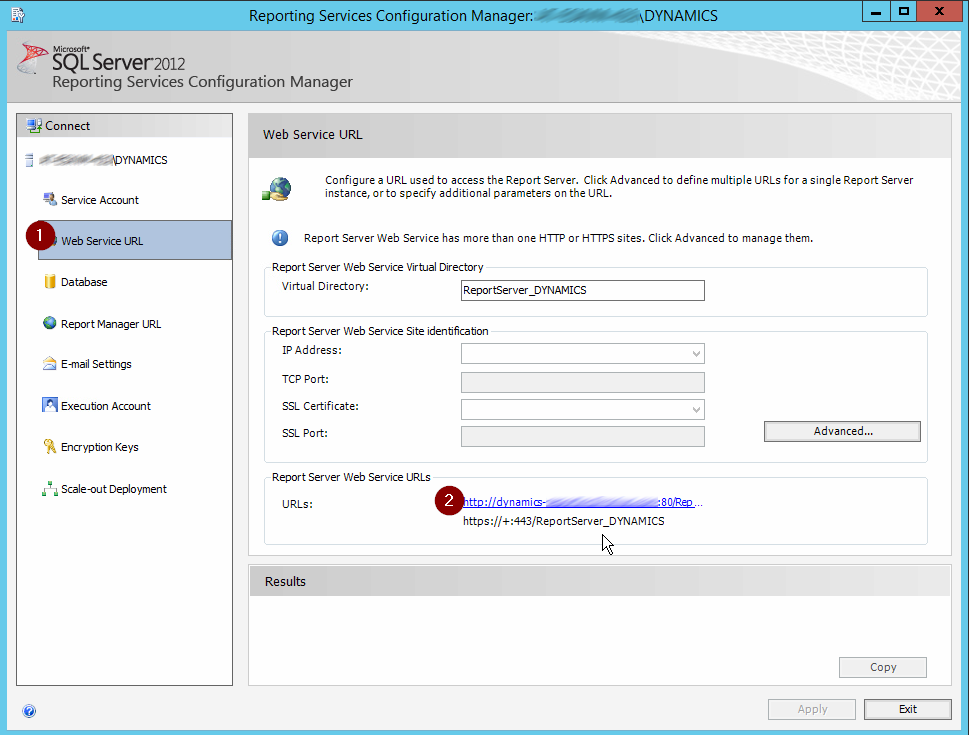
After the installation, open the reporting services configuration manager, connect to the created instance and follow the navigation on the left.
After adding the necessary information like service account and database you can check, if everything is running correct. Therefore navigate to “web service url” and open the displayed url with a click on it.

Open the ReportServer Webservice URL and check, if the default page is displayed. On this page you will see a listing of all directories. Each directory represents on CRM Organisation.
Also open the Report Manager URL. There you will see the same folders as in the “Report Server Web Service Url” page, but with additional options.
Navigate in the top menu to “Sitesettings”, then to “Security” and check, if the user, which is used in CRM as your administrator, has the access rights. Otherwise add the user with “System Administrator” to the security role.

Navigate back to the starting page and click “Folder settings”. Check if the CRM administrator user has the rights to access the folders.


Now try again in CRM to run your reports.